Creating a Motion Sensing Light with a Spark Core
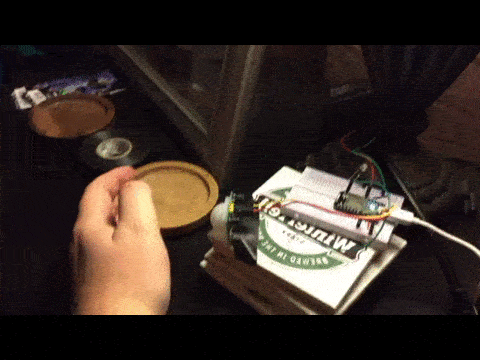
A nice guide to a simple IoT device for controlling lights. Below is a gif showing the optional connected led coming on due to the detected motion.
Guide
Supplies
Here is a list of all the things I used, hopefully you already have some of this stuff, or possbily you already have a relay you can use. Otherwise, I strongly recommend the power tail switch to avoid having to mess with life threatening power.
1. Spark Core

2. Power Tail switch

3. Human Sensor (HC-SR501)

4. Female to Male Jumper Cables

5. Preformed cables

Hardware Set Up
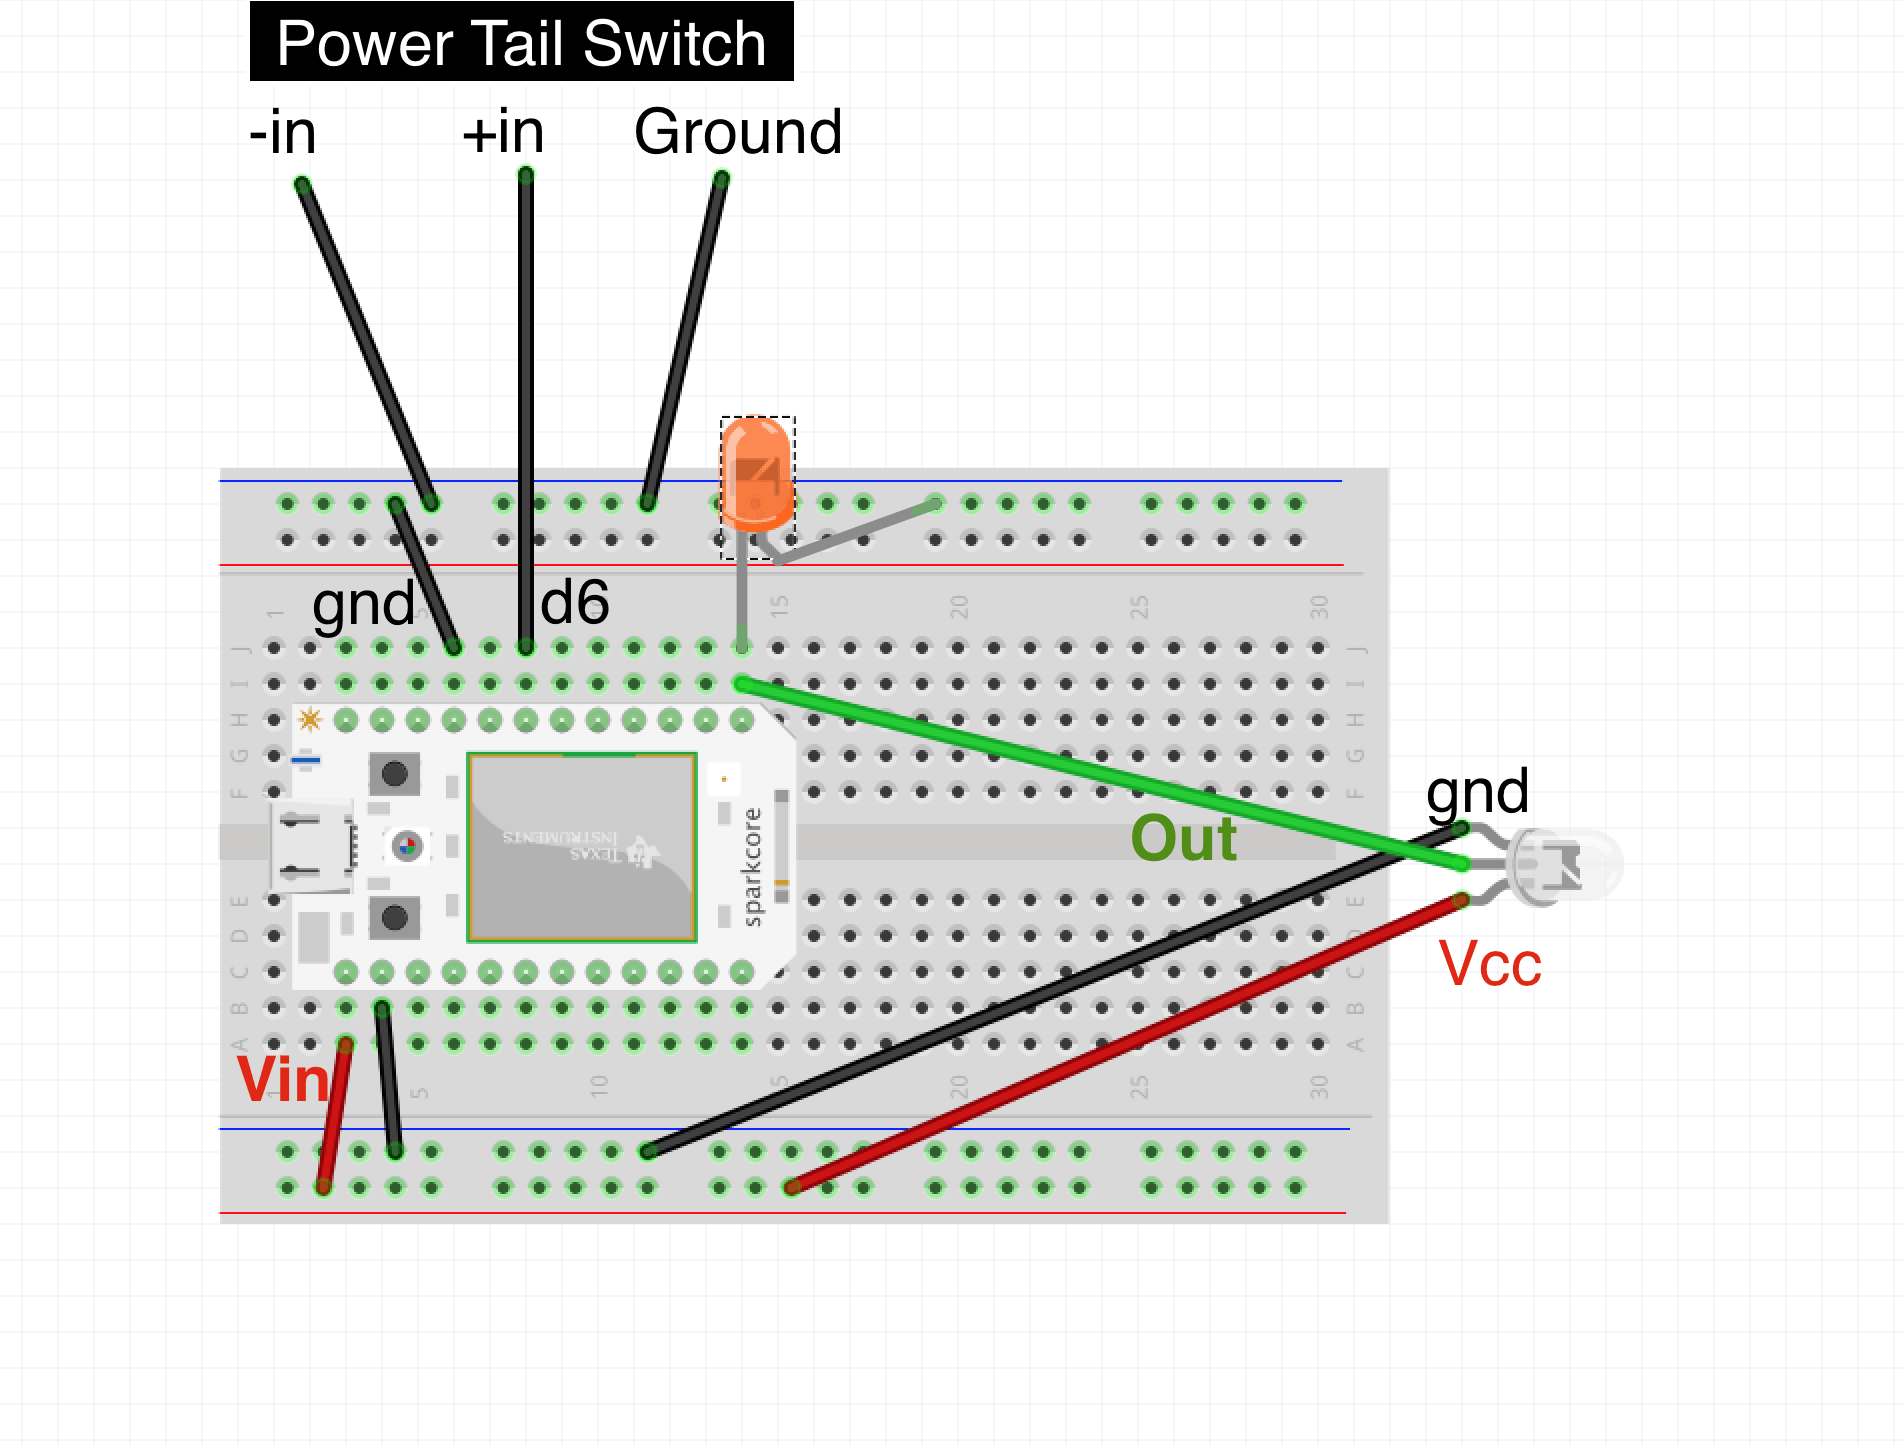
Here is a quick sketched layout showing how I hooked up the hardward. In this picture, the 3 pin LED is suppose to represent the HC-SR501.
Note that I had to connect HC-SR501 to the Vin of the Spark Core because the it actually wants to run at 5v.
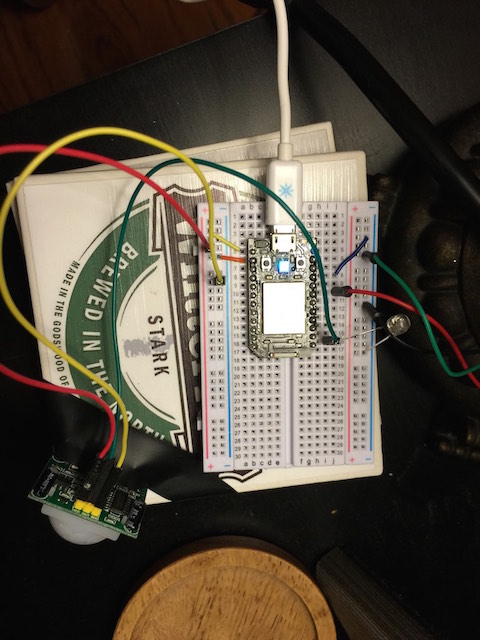
Here is my actual layout of the electronics.
Code
There’s actually some pretty cool stuff going on here. First off, realize that the out pin for the HC-SR501 (data sheet) has to be set to a INPUT_PULLDOWN because it does not pull down otherwise and would never properly trigger the interrupt.
Also we use the idea of a interrupt, which is something close to my Computer Engineering heart, so instead of constantly polling the pin to see if the state has changed. The pin will let us know when the state changes and fire off our function light_on when the state is RISING (spark doc).
Next, to handle turning the light off after 15 mins we use the millis() function. This function returns the number of milliseconds since the spark core was powered on. So, using a two second delay in our loop() function, we are checking that our set_time + 15 mins is less then the current time every two seconds.
Finally, in our light_on() function we make sure to reset the set_time incase the interrupt is triggered again while it is areadly on.
// functions
void light_on(void);
void light_off(void);
// variables
int ledPin = D6;
volatile int state = LOW;
unsigned long current_time;
volatile unsigned long set_time;

// 15 mins
#define FIFTEEN_MIN_MILLIS (15 * 60 * 1000)

void setup()
{
  pinMode(D0, INPUT_PULLDOWN );
  pinMode(ledPin, OUTPUT);
  attachInterrupt(D0, light_on, RISING);
  set_time = millis();
}

void loop()
{
  digitalWrite(ledPin, state);
  current_time = millis();
  if( set_time+FIFTEEN_MIN_MILLIS < current_time ){
    light_off();
  }
  delay(2000);
}

void light_on(){
 set_time = millis();
 state = HIGH;
}

void light_off(){
 set_time = set_time-FIFTEEN_MIN_MILLIS;
 state = LOW;
}
Conclusion
Quite simple and really easy to get set up once you have all the parts. Also its nice to have something home automated that actually is easier to use. Before I had the lights controlled by a button on a iOS app. While cool, this became impractical quick as it was a bigger inconvenience then this simple implementation.
I do plan to add back in the functionality to turn the light off with either a siri command as sometimes you want the lights out when you watch a movie, but I’ll save that for either another blog post or an update to this one.
###Congratulations you never have to turn a light on or off again. 🍻